

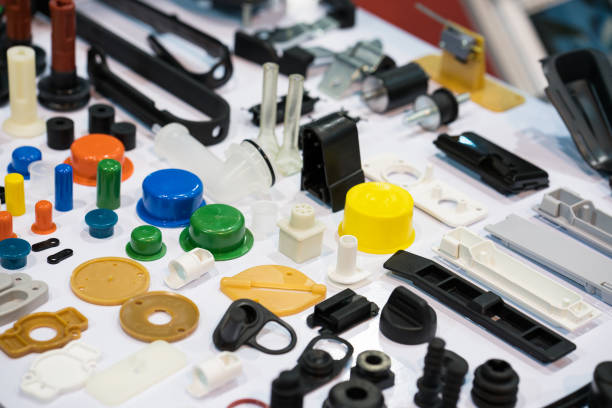
Product designers, mechanical engineers, and manufacturing procurement specialists routinely face a critical design choice when combining multi-material components: deciding between insert molding and overmolding. Because both multi-material injection molding techniques permanently join distinct substrate materials into a unified part, technical teams frequently compare these two processes. Consequently, OEM product managers often ask injection molding specialists a fundamental question: “Both insert molding and overmolding bond different materials together seamlessly, so what are the primary engineering differences, and how do I select the right process for my specific product application?”
Choosing the incorrect multi-material molding process can result in unnecessary tooling expenses, weak structural bond strength, or poor ergonomics. Sourcing solid brass threaded inserts when an overmolded elastomer grip is required wastes tooling budgets without adding tactile value. Conversely, attempting to use overmolding where metal structural reinforcement or electrical conductivity is necessary compromises component integrity. This comprehensive manufacturing guide breaks down the technical differences between insert molding vs overmolding, details their step-by-step production workflows, and offers strategic selection guidelines for custom injection molding projects.
1. Decoding Insert Molding: Encapsulating Pre-Formed Inserts for High Structural Strength
To evaluate the advantages of insert molding, engineers must analyze how pre-formed solid components integrate into molten plastic during a single molding cycle.
| Production Stage | Insert Molding Manufacturing Process |
|---|---|
| 1. Insert Placement | Operators place metal, ceramic, or pre-formed plastic inserts into the precision mold cavity. |
| 2. Mold Closing | The injection mold closes securely to hold the insert in the correct position during production. |
| 3. Resin Injection | Molten thermoplastic material flows into the mold cavity and surrounds the inserted component. |
| 4. Cooling and Ejection | The plastic resin cools and solidifies, creating a strong mechanical bond between the insert and molded part. |
Step 1: Insert the Placement in the Mold Cavity
Operators or automated robotic arms place pre-formed inserts—typically made of brass, stainless steel, copper, ceramic, or specialized rigid plastic—into designated mold cavity pockets.
Step 2: Mold Closure and Alignment
The injection mold tool closes precisely, clamping the insert firmly in position to prevent movement or core deflection during high-pressure resin injection.
Step 3: Thermoplastic Resin Injection
High-temperature molten plastic (such as ABS, Nylon, PC, or PBT) is injected into the mold cavity, completely encapsulating selected features of the insert, such as knurled grooves or undercut channels.
Step 4: Cooling and Mechanical Interlocking
As the plastic resin cools and shrinks slightly, it forms a permanent mechanical lock around the insert’s textured features. The machine then ejects a fully integrated, high-strength composite component.
Typical Applications for Insert Molding
Manufacturers widely use insert molding for demanding engineering applications, such as automotive sensor housings with embedded copper lead frames, threaded brass bushings for electronics enclosures, medical device handles, and rugged USB connector bodies.
2. Decoding Overmolding: Layering Soft Elastomers onto Rigid Substrates
While insert molding integrates solid metal or pre-formed inserts, overmolding focuses on layering a soft elastomer over a rigid plastic base component.
The overmolding process combines multiple materials into a single molded component. It improves product durability, grip performance, and functional design flexibility. The manufacturing process typically includes the following key stages:
| Production Stage | Overmolding Manufacturing Process |
|---|---|
| 1. Substrate Molding | The injection molding machine creates the rigid plastic base component with precise dimensions and stable structural strength. |
| 2. Substrate Transfer | The molded substrate moves into a secondary mold cavity or indexing system for the next molding stage. |
| 3. Soft Material Injection | The machine injects TPE, TPU, or silicone materials over the rigid substrate to form the flexible outer layer. |
| 4. Material Bonding | Heat, pressure, and material compatibility create a strong bond between the rigid substrate and soft resin layer. |
Through this controlled overmolding workflow, manufacturers create durable multi-material parts with improved functionality and product appearance.
Step 1: Molding the Primary Rigid Substrate
The injection molding press first molds the underlying rigid thermoplastic substrate (such as Polypropylene, Polycarbonate, or Nylon), creating the structural core of the part.
Step 2: Substrate Transfer
Robotics transfer the warm substrate to a second mold cavity (two-shot / multi-shot molding), or operators place the cured substrate into a secondary overmold tool (pick-and-place overmolding).
Step 3: Injecting the Secondary Soft Layer
A flexible elastomer—typically Thermoplastic Elastomer (TPE), Thermoplastic Polyurethane (TPU), or Liquid Silicone Rubber (LSR)—is injected directly over designated areas of the rigid substrate.
Step 4: Chemical and Thermal Interlocking
The secondary resin fuses chemically and thermally with the warm substrate surface, creating a seamless, permanent bond without adhesives.
Typical Applications for Overmolding
Product designers specify overmolding to enhance tactile grip, vibration damping, water sealing, and aesthetic appeal. Typical consumer and industrial examples include power tool handles, toothbrush grips, automotive interior knobs, and water-resistant medical housings.
Insert Molding vs. Overmolding Process Comparison Matrix
The selection table below compares the core engineering parameters, tooling requirements, and functional benefits of both multi-material composite molding methods:
| Engineering Evaluation Metric | Insert Molding Process | Overmolding Process |
| Insert / Substrate Materials | Metal (brass, steel, copper), ceramics, or rigid plastic | Typically, a rigid thermoplastic base (PC, ABS, Nylon, PP) |
| Secondary Layer Material | Rigid engineering thermoplastics (Nylon, ABS, PC, PBT) | Flexible elastomers (TPE, TPU, Silicone, LSR) |
| Primary Structural Benefit | High tensile strength, thread durability, and electrical conductivity | Ergonomic soft touch, vibration absorption, water sealing |
| Mold & Tooling Complexity | Single-cavity or multi-cavity standard mold tool | Two-shot rotary mold tool or two separate cavity tools |
| Shot Cycle Execution | Single injection shot encapsulating the insert | Two sequential injection shots (2K / Multi-shot) |
| Primary Bonding Mechanism | Mechanical interlocking via knurls, undercuts, and shrinkage | Molecular chemical adhesion fused with thermal bonding |
3. Strategic Selection Rules: How to Choose the Right Molding Process
Engineering teams and procurement specialists can streamline their custom plastic injection molding projects by following three clear selection protocols:
-
Select Insert Molding for Mechanical Strength and Electrical Features: When a design requires load-bearing threaded joints, electrical current conduction, or structural reinforcement, choose insert molding. Encapsulating brass inserts or copper pins provides superior torque retention and electrical connectivity that pure plastic cannot match.
-
Select Overmolding for Ergonomics, Sealing, and Shock Absorption: Choose overmolding when an application demands an anti-slip tactile grip, IP-rated dust and moisture sealing gaskets, or impact vibration dampening for handheld tools and medical devices.
-
Verify Chemical Compatibility for Overmolding Success: When specifying overmolding, ensure the primary substrate resin and secondary elastomer share compatible melt temperatures and chemical structures. Compatible polymer combinations—such as Polycarbonate with TPU or Polypropylene with TPE—achieve robust molecular adhesion without delamination.
Conclusion: Optimize Multi-Material Components with Precision Injection Molding
In conclusion, analyzing insert molding vs overmolding performance characteristics empowers engineering teams to select the optimal manufacturing path for structural strength, functional integration, and ergonomic performance.
Stop guessing whether to encapsulate metal inserts or layer soft-touch elastomers over your plastic components. Choosing insert molding for high-torque threaded fasteners or overmolding for ergonomic grips and watertight seals guarantees long-term product durability, reduced assembly labor, and high manufacturing efficiency. We engineer every custom mold tool, calibrate every temperature zone, and monitor every injection cycle to satisfy strict international manufacturing standards. Contact our plastic injection engineering specialists today to review 3D CAD files, evaluate material compatibility, and request a detailed tooling proposal.


Add comment